Salvaging your old tiles so that you can reuse it is a bit tricky, but possible. Whenever you renovate a space, there will surely be some tiles that you would like to salvage. It may be because you just don’t like crushing up a perfect tile, or the tile have a vintage aesthetic which you cannot find anymore. Removal of the tile could be tricky because it is fragile. Nonetheless, there are some ways that you can do so that you can save your tiles for a new project.
Safety is the TOP Priority
You should keep in mind that you must ensure your safety before you start cutting or destabilizing any materials. When dealing with tiles, you should take correct safety precautions whether you chip this away or use a chemical agent in dissolving the grout. Safety precautions will include wearing of gloves, breathing masks, eye protection, and other necessary equipment.
Removing the Tile for Salvage
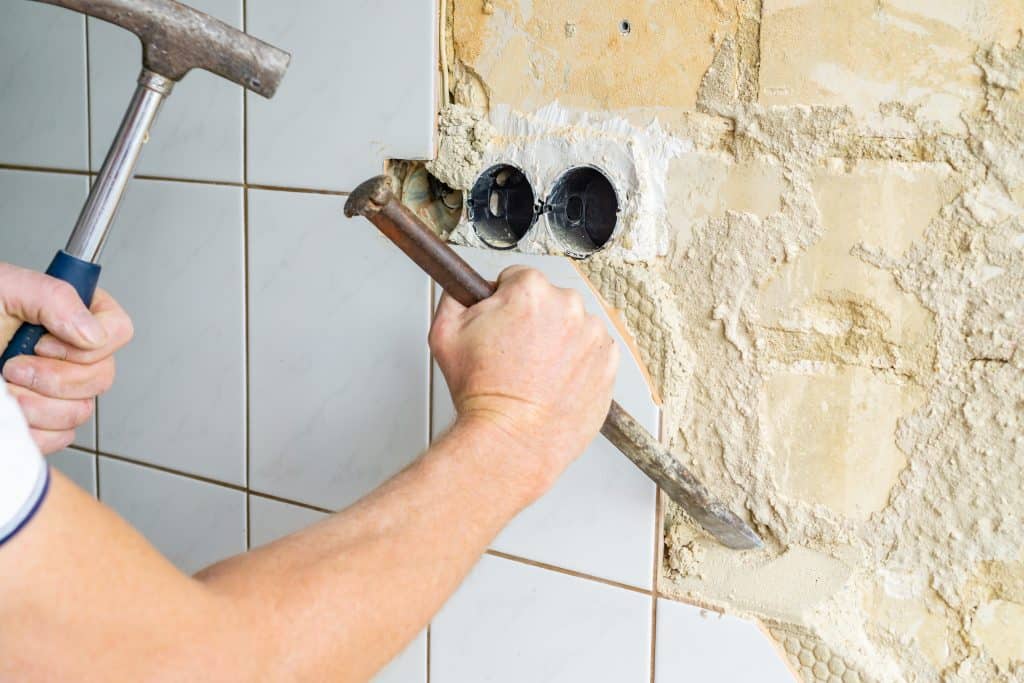
To make sure that you will not break the tile upon dislodging it, you have to remove the grout. Removing this can be done with either a flathead screwdriver along with a mallet or by using a grout saw. Compared to a tile material, the grout is more brittle. So, you have to be delicate and cautious when chipping it on the sides.
Once you have successfully chipped or sawed away the tile’s border, you will now gain access to the tile’s side. This will then give you a sandwich-like view and will reveal to you the adhesive that attaches the tile and the floor. Choose a pry bar that matches the tile and the adhesive’s size. Note that too thin pry bar cannot remove the tile form the surface. Also, too thick pry bar can damage the tile. You have to carefully pry up all the corners of the tile. Take your time in loosening each side of the tile until it gives away.
In this process, there is a chance that you might break a few tiles. If you do, make sure that you estimate the amount of pressure that broke the tiles and make sure not to do it again. A broken tile can surely give you enough understanding already of the amount of pressure that you must exert.
Now, if the tile that you will be removing is one from the wall, make sure that you observe an even pressure on the tile’s center so that you can catch it.
Cleaning the Remaining Grout and Adhesive from the Removed Tile
Once the tile has been removed already, there will surely be adhesive at the back and grout on the edges. Soak the tile in a warm water for a couple of hours. As the tiles were soaked in water, you will notice that there are small bubbles at the back of the tile. These bubbles are trapped air between the tile and adhesive. Remove the tile from the water and then use a blade or a putty knife to scrape off the adhesive residue softly. Take note that you should also scrape off the excess grout so that your tile will have a clean look.
“New” Tiles and Ready to go
And now, you already have a new and fresh tile that you can install wherever you want. See to it that you store safely these tiles so that it will not get broken. Know that these tiles could be more brittle compared to its newer counterparts because of its age. But when you install this properly and carefully, surely these tiles can serve you well.
Do you only need to remove tiles?
Are you sure that you only want to remove your old tiles? If you are in need of a demolition team, contact Conway AR Demolition Contractor.
Do you know How to Remove a Construction Adhesive from a Brick?